Settings
Printer Settings
Last, you should (re)load your settings; there are several screens, detailed below.
To load a configuration file, do the following:
- Go to Setings > Printer.
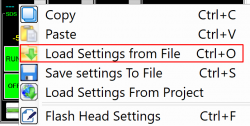
- Click "Load Settings from File" - see file names below
- Make any customization you like
- Click "Flash Motion Settings"
- Click "Apply"
- Click "Save Settings To File" with your custom name, as a backup
- Click "OK"
Note that after flashing, or upon startup, you will be required to home the X and Y axes before other moves are allowed; on the EHR, you will also have to home the Z. This is so that the printer knows where you are and whether or not it is safe to move the amount you tell it to. If you unlock your motors or press the emergency stop button, you should home the X and Y axes again before making other movements (also Z on EHR).
While each printer is shipped with tested, verified settings, you are welcome to customize your unit. For example, a second yoke will reduce your max travel in the X; an auxiliary build plate may have smaller dimensions; tall Hydras will have more travel in the Z; and you will probably want to limit your travel if you've added a vise or chuck.
The latest Printer Settings files are available at http://hyrel3d.net/downloads/repetrel/Printer_Settings_2019.12.05.rar Note that these are included in the latest v4 Repetrel download.
File Names
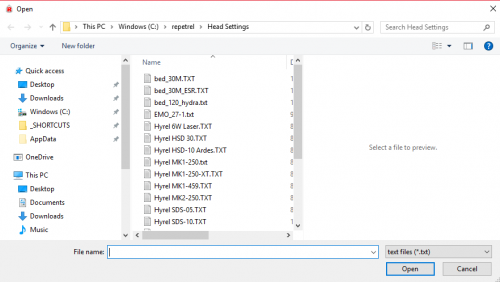
When you select "Load settings from File" (or "Switch Printer Type" from the menu), here's what the file names mean:
| File Name | Model/Version | Special Notes |
|---|---|---|
| 16AS | 16A Standard | Standard |
| 16AS_2Y | 16A Standard | 2nd Yoke |
| 16AS_2Y_45A | 16A Standard | 2nd Yoke, 4th/5th Axis |
| 16AS_45A | 16A Standard | 4th/5th Axis |
| 16AT | 16A Tall | Standard |
| 16AT_2Y | 16A Tall | 2nd Yoke |
| 16AT_2Y_45A | 16A Tall | 2nd Yoke, 4th/5th Axis |
| 16AT_45A | 16A Tall | 4th/5th Axis |
| 30M_ESR | 30M and ESR | Standard |
| EHR_diffXY | EHR | *early models |
| EHR_standard | EHR | Standard |
| ESR_30M | ESR, 30M | Standard |
| 30M_ESR | 30M, ESR | (same as above) |
| fadal429 | Fadal CNC | Standard |
Ecosystem Apps
In Repetrel, go to the Programs tab, and double click in each text field, pointing the applications to their respective executable files under C:/EcosystemApps. See the table below for the proper locations. Note the new location for the Slic3r install; Slic3r Recipes (or Slic3r CFG files) should still be under C:\Users\Hyrel\AppData\Roaming\Slic3r.
| Program Name | Executable Location |
|---|---|
| Slic3r EXE | C:\EcosystemApps\Slic3r\slic3r.exe
|
| Slic3r CFG | C:\Users\Hyrel\AppData\Roaming\Slic3r
|
| OpenSCAD | C:\EcosystemApps\OpenSCAD\openscad.exe
|
| FreeCAD | C:\EcosystemApps\FreeCAD 0.15\bin\FreeCAD.exe
|
| MeshLab | C:\EcosystemApps\VCG\MeshLab\meshlab_32.exe
|
| FlatCAM | C:\EcosystemApps\FlatCAM\FlatCAM.exe
|
| QCAD | C:\EcosystemApps\QCAD\qcad.exe
|
| TeamViewer | C:\EcosystemApps\TeamViewer\Version9\TeamViewer.exe
|
| InkScape | C:\EcosystemApps\inkscape\inkscape.exe
|
| GIMP | C:\EcosystemApps\GIMP 2\bin\gimp-2.8.exe
|
Note that if your login ID is not "Hyrel", you'll need to adjust the location for the Slic3r cfg file appropriately. Remember to click APPLY when done to cause these settings to be applied.
Head & Bed Settings
The latest Head Settings files are available at http://hyrel3d.net/downloads/repetrel/Head_Settings_2019.12.05.rar Note that these are included in the latest v4 Repetrel download.
For Filament-based heads, see the table(s) on our Hot_Flow page.
For Reservoir-based heads, see the table(s) on our Cold_and_Warm_Flow page.
For Hotbeds, we now (v4) have files stored, just like head settings files. If you didn't get them, email me and I'll put the info here.
The names should be self-explanatory:
- bed_30M_ESR.txt
- bed_120_hydra.txt
- bed_200_hydra.txt
- bed_EHR.txt
Right-click on the head (anywhere EXCEPT the "FLASH" button) and open the proper file for your head or bed:
And select the file for the device for which you wish to load the settings:
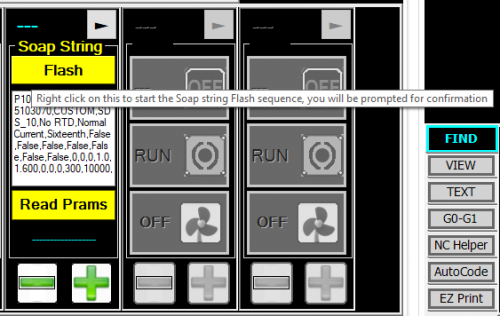
As with all settings, to store them as defaults, go to the last page and right-click FLASH:
And then click YES:
Slicer Settings
For Slicer settings, see the Recipes page.


